
The 2023 Spring/Summer woodworking season kicked off last week. This project began with a bit of preseason preparation. I used Open Office Calc like a pad of graph paper and converted the design in my head into detailed plans.

After a few rounds of double checking and second guessing, I emailed the plans to Dad. They included parts layouts on sheets of 3/4” plywood (first image) and 1/2” plywood. Along with those, I sent top-, front- (above), and right-side views of the assembled cabinets. The dotted (hidden) lines on the front view show the edges/corners of rabbet joints. The yellow areas represent the plywood’s edges.

Dad picked up a full sheet of 3/4” birch plywood and was able to buy a quarter sheet of the 1/2”. He took them home, cut the parts and their rabbets, then assembled the basic boxes. He also cut 1/2” trim strips from a maple board I’ve had for years. Here they are with the assembled boxes.
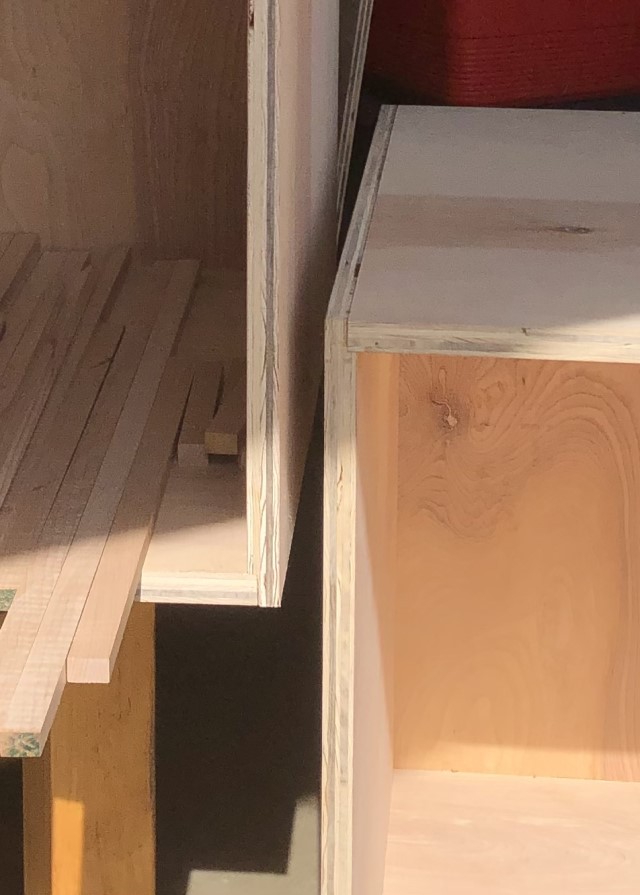
The trim will cover the joints and the plywood’s bare edges. It will also provide the solid wood necessary to route a round over onto the edges.

Here’s the front of one of the boxes with the vertical trim glued then secured with blue tape. It was necessary to route the short, inside edges on both ends beforehand. There won’t be enough clearance for the router bit afterward. The clamps are holding pieces used to determine the trim’s lengths and positions.

I wanted the back trim to look like the front trim. That would mean routing the inside edges of the back trim after we installed it. The back panels would prevent us from doing that. Instead, we taped and clamped the back trim on top of the front trim. The open space allowed Dad to route the inside corners of the mocked-up back trim. Next, he finished the middle of each piece on the router table. Then he glued and ‘clamped’ them where they belonged.

Day three began with cutting the top and bottom trim pieces to length. Dad followed that by routing the long, inside edges of all eight pieces. This was also necessary due to the lack of clearance for the router bit’s bearing and nut.
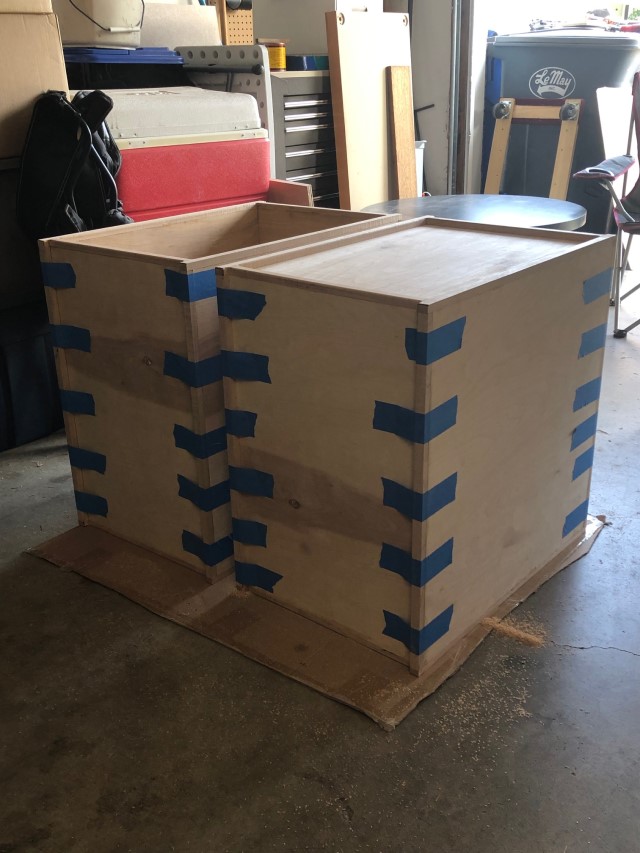
Here are the boxes with all the trim installed. Phase 1 concluded with Dad routing the inside edges of the face trim. Phase 2 will begin with me sanding everything.
I like what I’m seeing! Don’t want any spoilers, but will this desk be something of a ‘modular’ build? All that lumber together will be heavy! Good work so far, Norm would be proud!
Yeah, yeah, Mr. Wolf, modular.
Looks like we know what we’re doing. Fool more people that way.